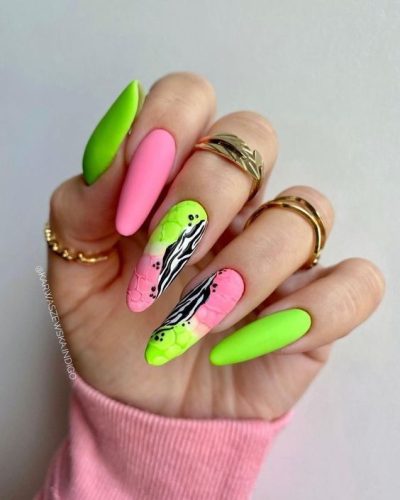
Elevate your nail game to a whole new level with the enchanting world of ombre nails. This mesmerizing nail art technique has taken the beauty world by storm, offering a graceful blend of colors that transitions seamlessly from one shade to another. In this article, we’ll delve into the captivating trend of ombre nails, explore the techniques behind achieving the perfect gradient, and inspire you with creative design ideas to make your nails stand out.

The Magic of Ombre Nails
Ombre nails, derived from the French word meaning “shaded” or “graduated,” create a stunning visual effect that’s both elegant and eye-catching. By seamlessly blending two or more shades, you’ll achieve a captivating gradient that showcases depth and dimension on your fingertips. Whether you’re a fan of subtle transitions or bold color combinations, ombre nails offer endless possibilities for expressing your personal style.

Achieving the Perfect Ombre Gradient
Creating flawless ombre nails requires patience and precision. Follow these steps to achieve salon-worthy results:
- Gather Your Supplies: You’ll need at least two nail polish colors that blend well together, a makeup sponge, nail polish remover, cotton swabs, and a topcoat.
- Prep Your Nails: Start by shaping and cleaning your nails. Apply a base coat to protect your nails and enhance the longevity of your manicure.
- Paint the Sponge: Apply the two chosen nail polish colors side by side on the makeup sponge, ensuring they slightly overlap in the middle.
- Dab the Sponge: Gently press the sponge onto your nail, starting from the cuticle area and moving towards the tip. Dab repeatedly to create a smooth gradient.
- Repeat and Blend: Repeat the process for each nail, reapplying nail polish to the sponge as needed. For a more seamless blend, slightly overlap the sponge with the previous color on your nail.
- Clean Up: Use a cotton swab dipped in nail polish remover to clean up any excess polish on your skin.
- Finishing Touch: Apply a glossy topcoat to seal and protect your ombre design, adding shine and longevity to your manicure.
Creative Ombre Design Ideas
Beyond the classic two-color gradient, ombre nails offer endless design possibilities:

- Rainbow Ombre: Experiment with a spectrum of colors for a vibrant and playful look.
- Metallic Ombre: Add a touch of glamour by incorporating metallic shades into your gradient.
- Reverse Ombre: Start with a darker color at the tip of your nails, fading into a lighter shade towards the cuticle.
- Glitter Ombre: Incorporate glitter into your gradient for a dazzling and glamorous effect.
Maintaining Your Ombre Manicure
To prolong the life of your ombre nails, apply a clear topcoat every few days to prevent chipping and maintain the smooth transition between colors.
Final Thoughts
Ombre nails are a stunning testament to the artistry of nail design. With the right technique and a touch of creativity, you can achieve a breathtaking gradient that showcases your unique style. Whether you’re drawn to subtle transitions or bold contrasts, ombre nails offer a canvas for self-expression that’s both elegant and captivating. So, dive into the world of ombre and let your nails tell a mesmerizing story of beauty and art.
